Organize objects with groups
By the end of this tutorial you will have created a group, added two objects to it, and queried the result end-to-end. You'll leave with a concrete mental model of how groups work and where to go next.
This tutorial uses BuiltinTag objects so you can follow along without any special schema. The same steps apply to any object type.
What you will need
- A running Infrahub instance (local or remote).
- Permission to create and modify groups.
- Two tags to add as members. If you don't have tags yet, create two called
redandbluebefore starting.
Step 1 — Create a new group
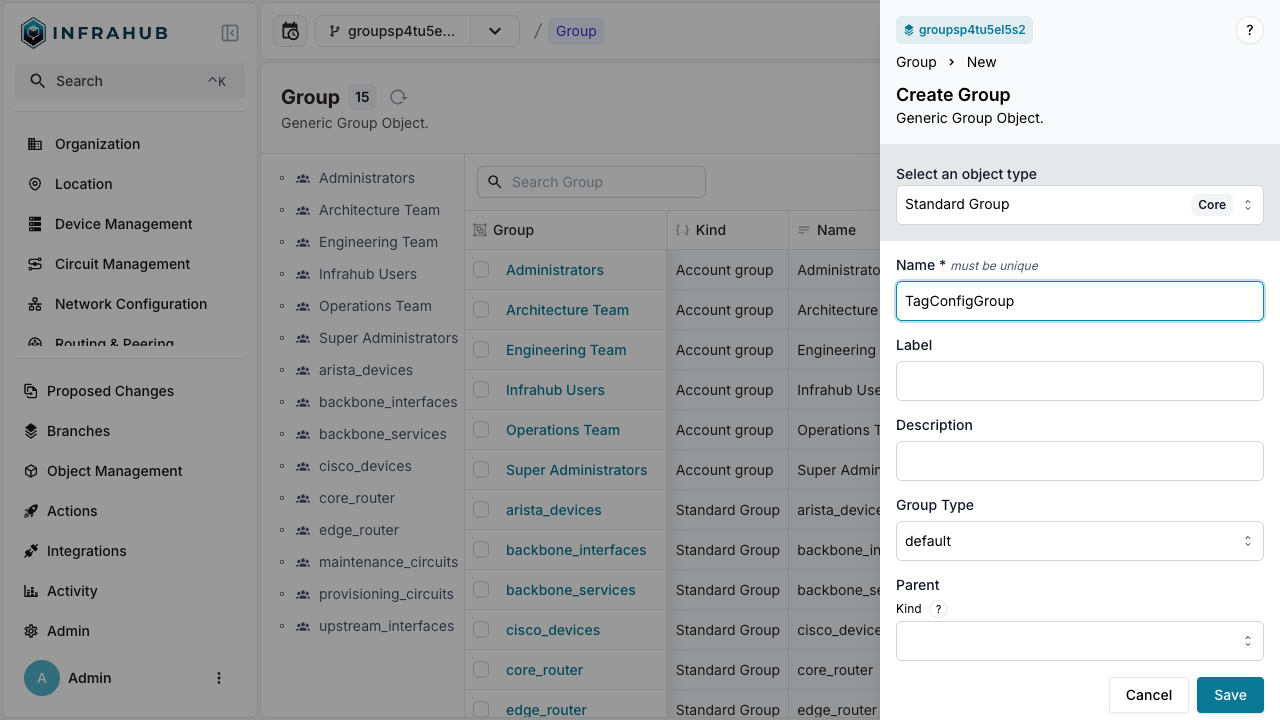
You'll create a Standard group named TagConfigGroup. A Standard group is the general-purpose type you create and manage yourself.
- Web Interface
- GraphQL
- Python SDK
Navigate to Object Management → Groups in the left menu. Click New Group and provide:
- Name:
TagConfigGroup - An optional description.
- Group type:
CoreStandardGroup.
Open the GraphQL interface at http://localhost:8000/graphql and run:
mutation CreateGroup {
  CoreStandardGroupCreate(data: {name: {value: "TagConfigGroup"}}) {
    ok
    object { hfid }
  }
}
Save the hfid returned — you'll use it in the next step.
from infrahub_sdk import InfrahubClientSync

client = InfrahubClientSync(address="http://localhost:8000")

group = client.create(kind="CoreStandardGroup", name="TagConfigGroup")
group.save()
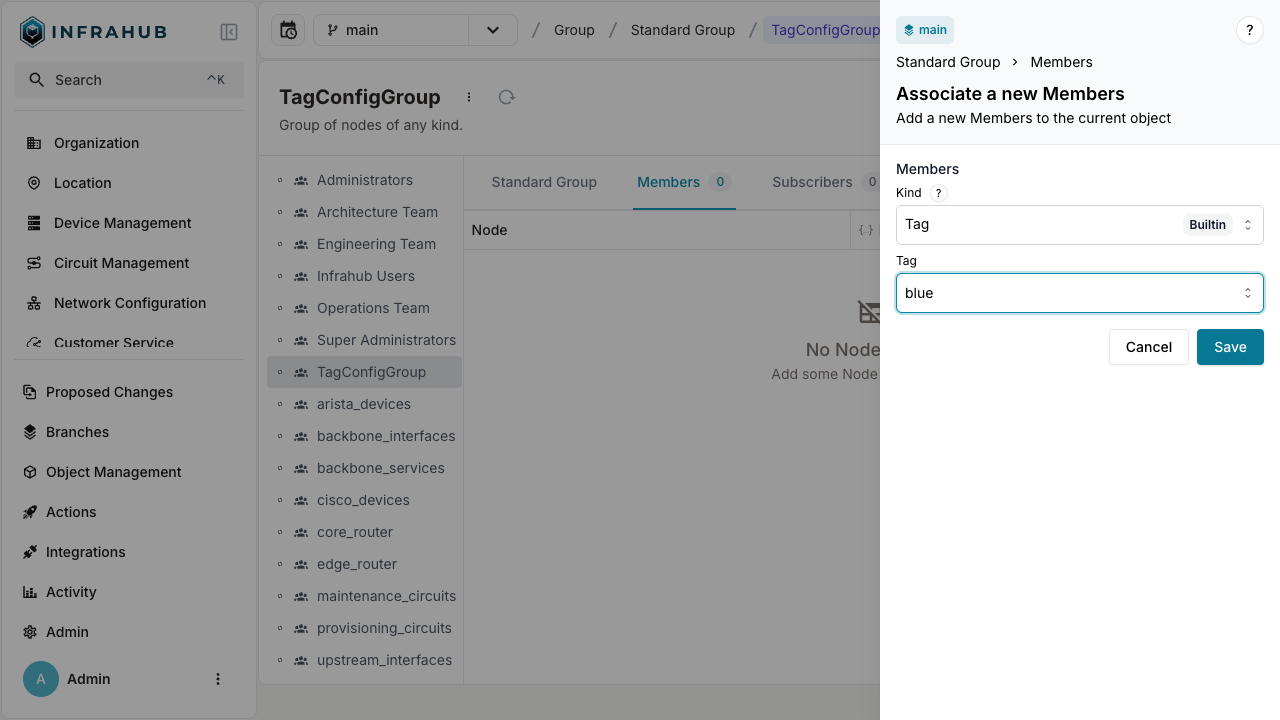
Step 2 — Add two tags as members
Attach your red and blue tags to the group.
- Web Interface
- GraphQL
- Python SDK
- Open
TagConfigGroupfrom the Groups list. - Go to the Members tab.
- Click Add Members and select
redandblue. - Click Save.
First, look up the tag IDs:
query {
  BuiltinTag(name__values: ["red", "blue"]) {
    edges {
      node { id display_label }
    }
  }
}
Then update the group with those IDs as members:
mutation UpdateGroupMembers {
  CoreStandardGroupUpdate(
    data: {
      hfid: ["TagConfigGroup"],
      members: [
        {id: "<id of red tag>"},
        {id: "<id of blue tag>"}
      ]
    }
  ) {
    ok
  }
}
group = client.get(kind="CoreStandardGroup", name__value="TagConfigGroup")

red_tag = client.get(kind="BuiltinTag", name__value="red")
blue_tag = client.get(kind="BuiltinTag", name__value="blue")

group.members.add(red_tag)
group.members.add(blue_tag)
group.save()
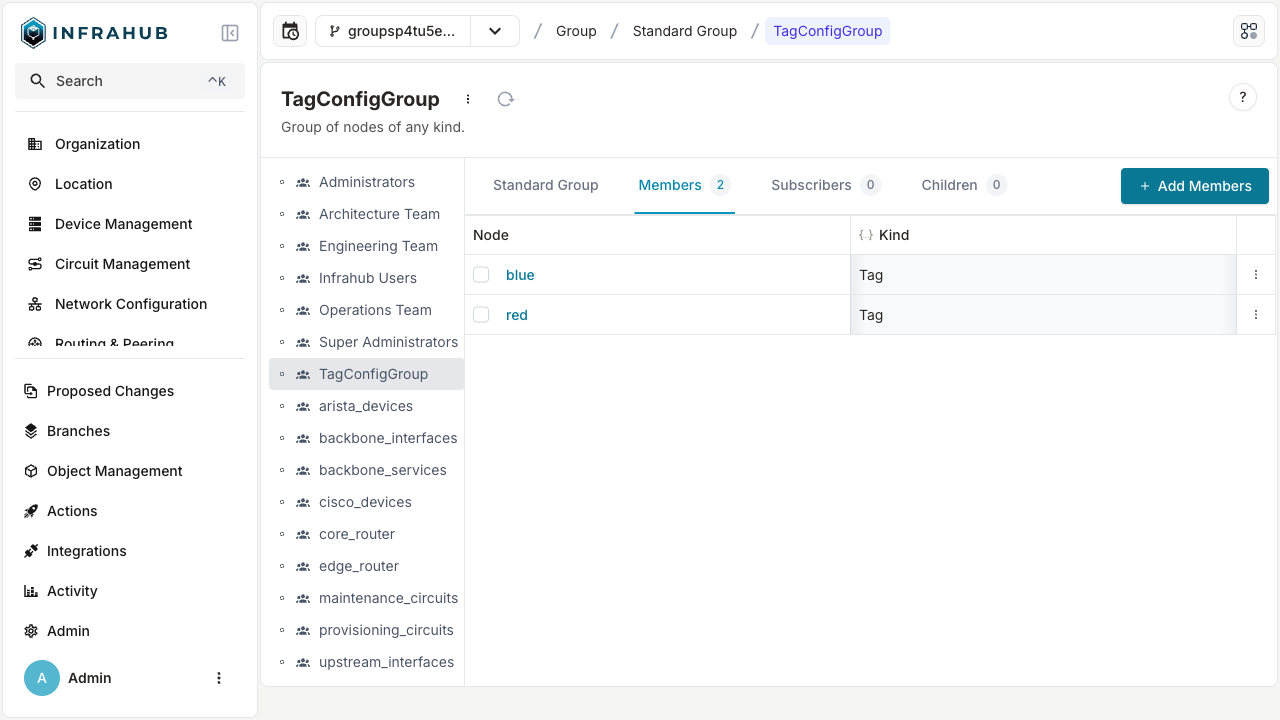
Step 3 — Verify
Confirm both tags are now in the group.
- Web Interface
- GraphQL
- Python SDK
Open TagConfigGroup and check the Members tab. Both red and blue should appear.
query {
  CoreStandardGroup(name__value: "TagConfigGroup") {
    edges {
      node {
        name { value }
        members {
          edges {
            node { display_label }
          }
        }
      }
    }
  }
}
group = client.get(kind="CoreStandardGroup", name__value="TagConfigGroup")
for member in group.members.fetch():
    print(f"Member: {member.display_label}")
What you learned
- Groups are first-class objects in the graph with their own attributes and relationships.
- A Standard group is manually managed — you decide what goes in it.
- Membership is a relationship, so changes flow through the graph and can be queried from either side.
Where to next
- Groups overview — concepts, architecture, and when to choose each group type.
- Add more members to a group — how-to reference.
- Use groups in automation — target groups from Artifacts, Transformations, and Checks.