Use artifacts
Generate configuration files and other artifacts by combining Infrahub data with templates. This guide shows you how to create artifacts that automatically update when your infrastructure data changes.
For conceptual information about artifacts and their architecture, see Artifacts.
Assumes a working Infrahub instance, an existing Transformation (Jinja2 or Python), permission to create and modify schemas, and a Git repository connected to Infrahub.
Enable artifact generation on your schema
To generate artifacts for specific nodes, modify your schema to inherit from CoreArtifactTarget.
---
version: "1.0"
nodes:
  - name: Device
    namespace: Network
    display_label: "{{ name__value }}"
    inherit_from:
      - CoreArtifactTarget
    attributes:
      - name: name
        kind: Text
        label: Name
        optional: false
        unique: true
      - name: description
        kind: Text
        label: Description
        optional: true
Load the modified schema into Infrahub:
infrahubctl schema load /tmp/schema.yml
Create a target group
Create a Standard Group to define which objects will generate artifacts.
- Navigate to the Groups section in the web interface
- Create a new Standard Group named
DeviceGroup - Add your target devices (
switch1,switch2,switch3) as members
For detailed group creation steps, see Create a group.
Define the artifact generation
Add an artifact definition to your repository's .infrahub.yml file:
artifact_definitions:
  - name: "Device configuration file"
    artifact_name: "device_configuration"
    parameters:
      name: "name__value"
    content_type: "text/plain"
    targets: "DeviceGroup"
    transformation: "device_config_transform"
This configuration specifies:
- name: Machine identifier (no spaces)
- artifact_name: Human-readable label
- parameters: Values passed to the Transformation query
- content_type: MIME type of the generated artifact
- targets: Group containing target objects
- transformation: Name of the Jinja2 or Python Transformation
For complete .infrahub.yml syntax, see infrahub.yml configuration.
Deploy the artifact definition
Commit and push your changes to activate the artifact generation:
git add .
git commit -m "add device_configuration artifact definition"
git push origin main
The task workers will detect the repository change and create the artifact definition in the database.
Verify artifact generation
Check that your artifacts are being generated correctly.
Through the web interface
- Navigate to Object Management → Artifacts
- Locate your generated artifacts in the list
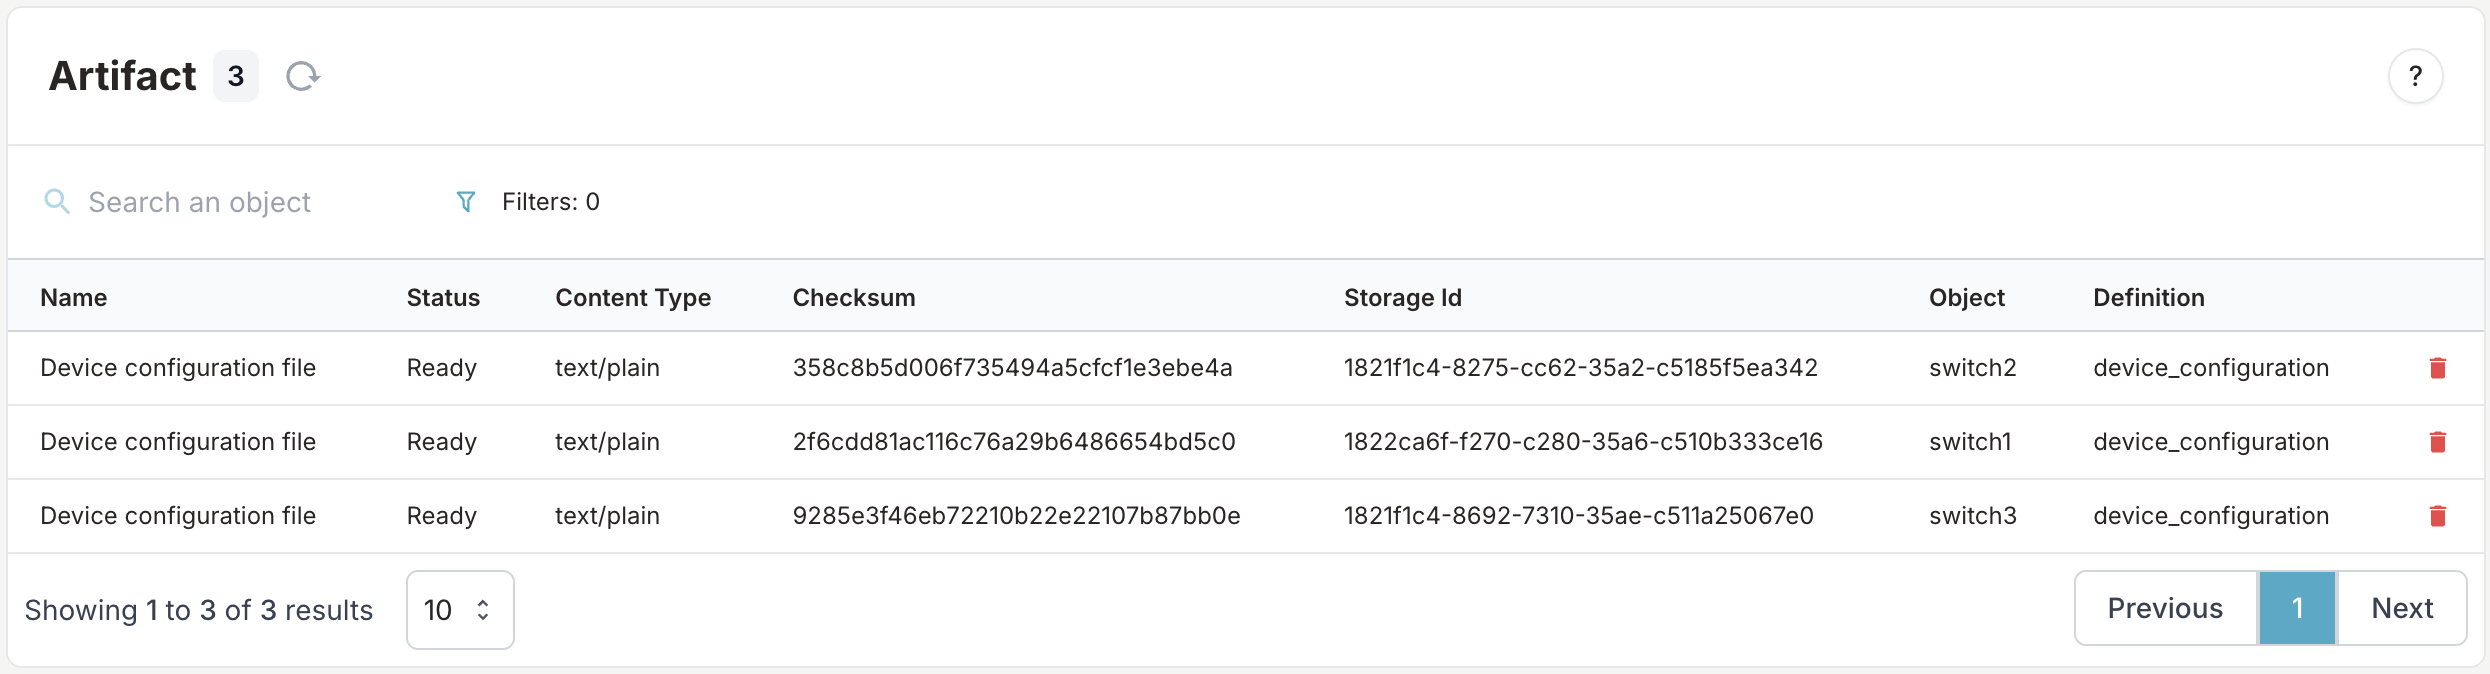
- Click on an artifact to view its content
Through object details
- Navigate to a specific device (for example,
switch1)
- Select the Artifacts tab
- View all artifacts generated for this object
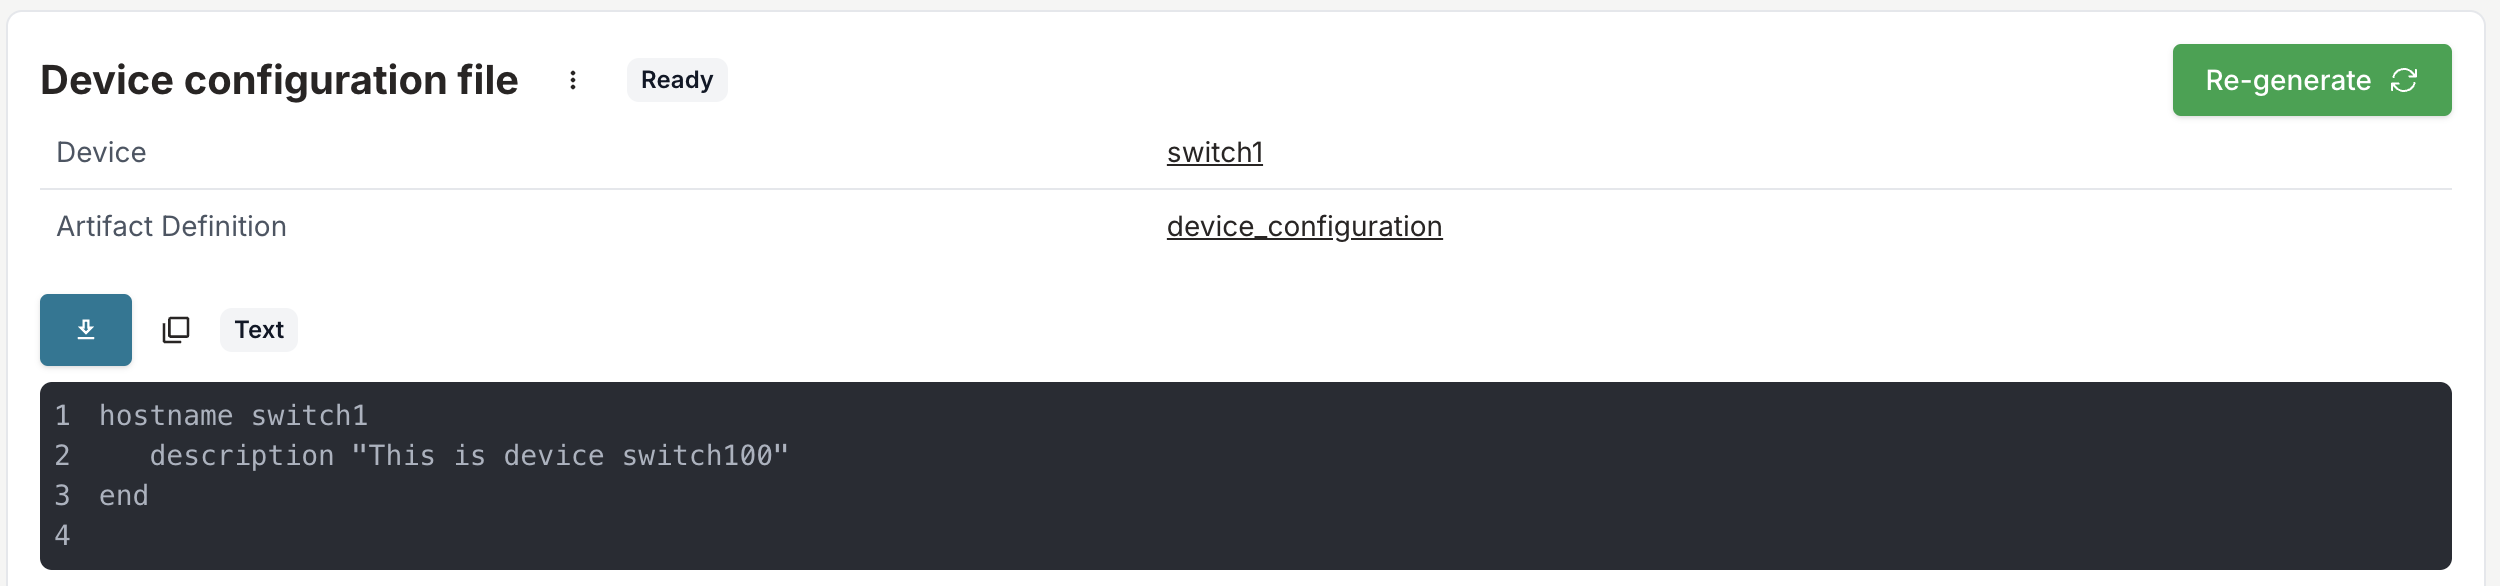
Access generated artifacts
Download or retrieve your artifacts using these methods:
Web interface download
Click the download button on any artifact detail page.
REST API access
Download artifacts using the storage object endpoint (authentication required):
curl -H "X-INFRAHUB-KEY: <your-api-token>" \
  http://<INFRAHUB_HOST:INFRAHUB_PORT>/api/storage/object/<storage_identifier>
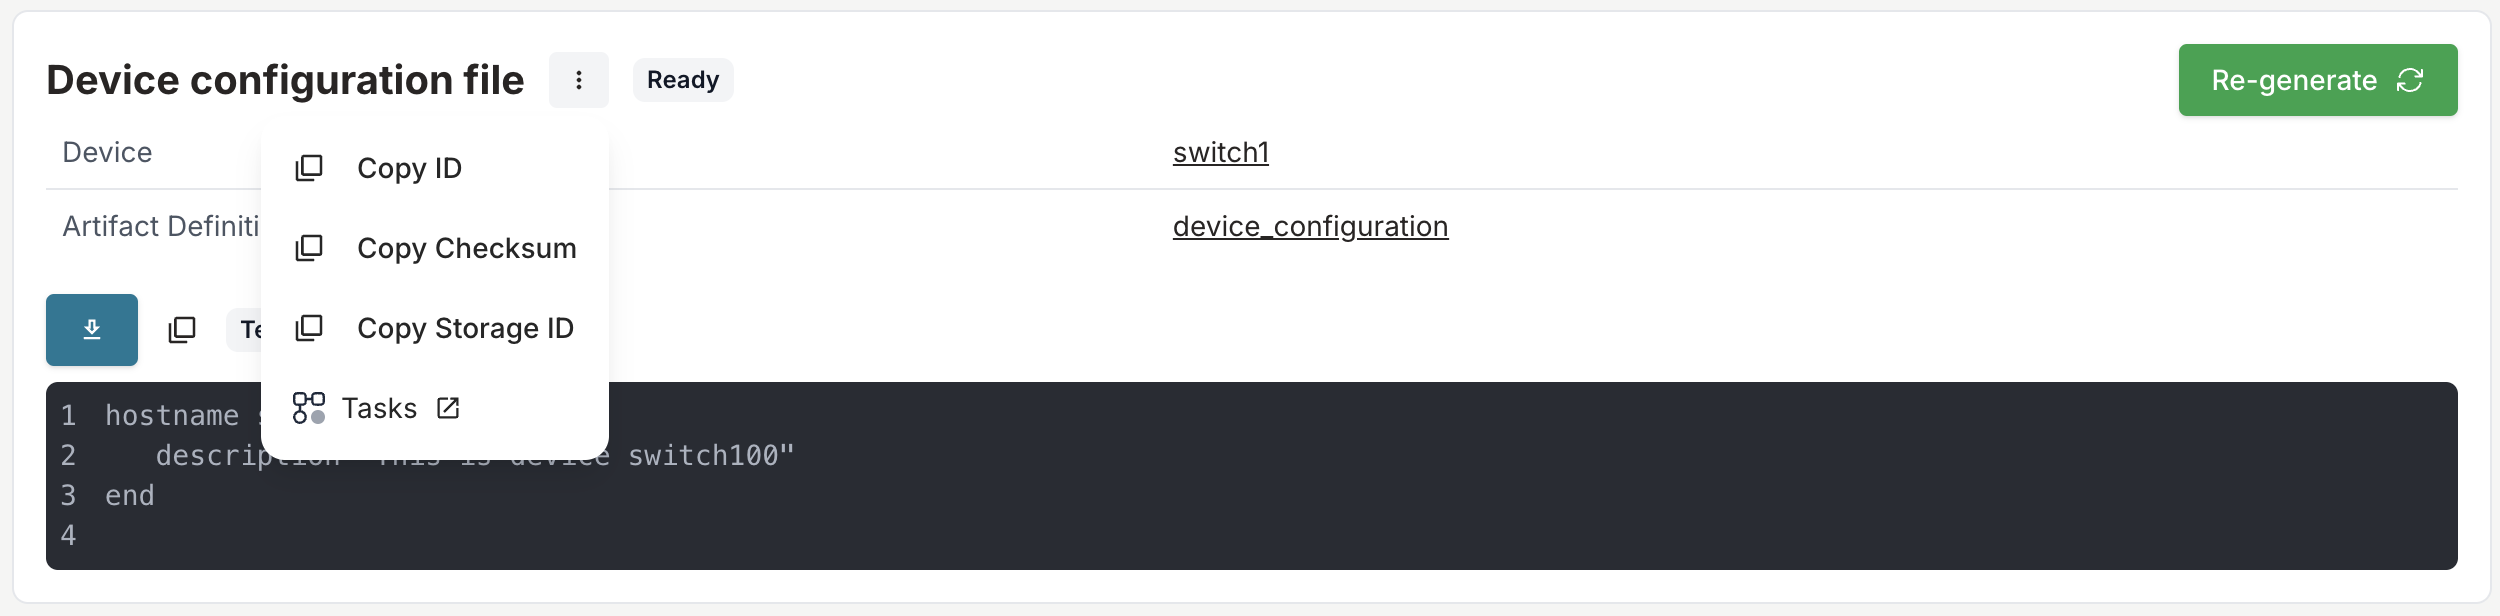
Copy the artifact ID from the artifact menu:
Programmatic access
Query artifacts through the GraphQL API for automation workflows.
Validation
Confirm your artifact generation is working:
- ✓ artifact definitions appear in the web interface
- ✓ artifacts are generated for all group members
- ✓ Generated content matches your template expectations
- ✓ artifacts update when source data changes
Troubleshooting
If artifacts aren't generating:
- Check task worker logs for processing errors
- Verify the Transformation name matches exactly
- Ensure group members inherit from
CoreArtifactTarget - Confirm the Git repository sync is working
Related
- Artifacts — concept and architecture
- Composing artifact content — assemble a composite artifact from other artifacts or file objects
- Write a Python Transformation — for non-template logic
- Transformations — reshape graph data into another format
- Connect a repository — automate artifact deployment