Creating accounts, groups, roles, and permissions
In Infrahub, managing access and control starts with creating accounts, assigning them to groups, and managing their roles and permissions. This guide outlines how to create new accounts, accounts groups, and assign roles and permissions.
For more information on roles and permissions, see the Roles and Permissions topic.
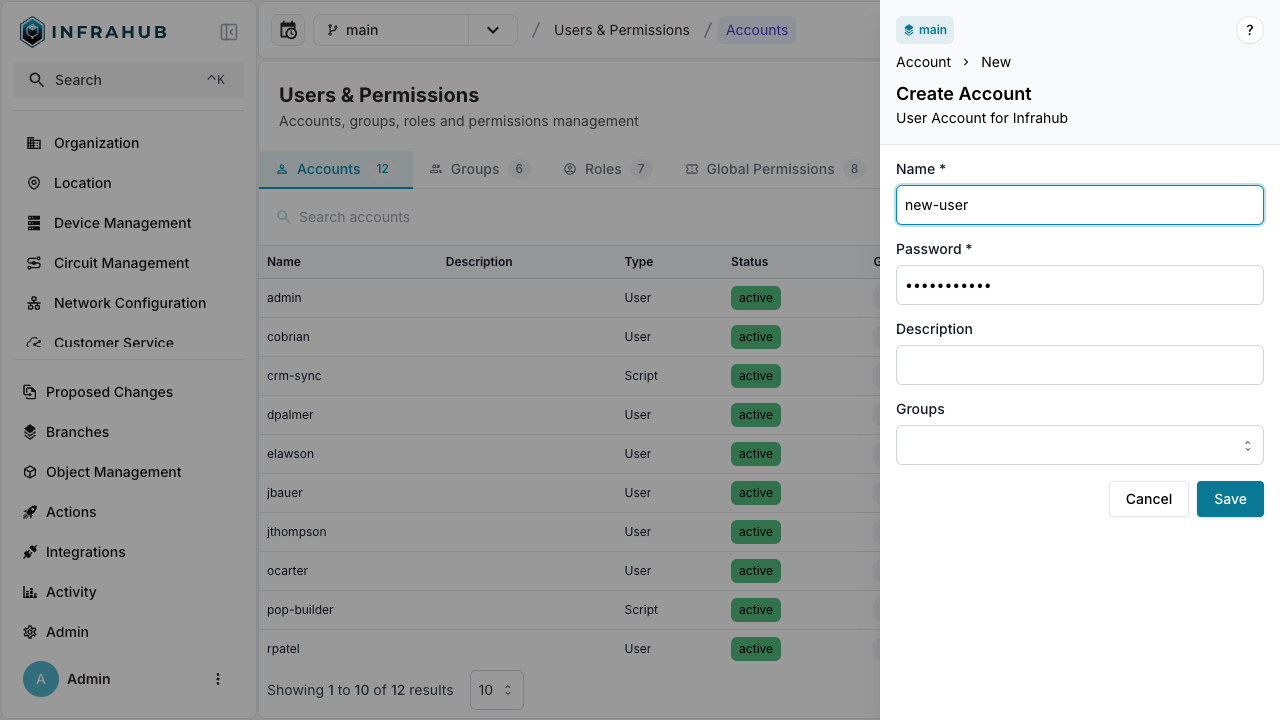
Creating a new account
- Via the Web Interface
- Via the GraphQL Interface
Via the Web Interface
- Log in to the Infrahub UI as an administrator.
- Go to Admin > Role Management in the left side menu.
- In the Accounts tab, click on Create Account.
- Fill in the account's details (name, email, and password).
- Optionally, assign the account to a group.
- Click Create to create the account.

Via the GraphQL Interface
In the GraphQL sandbox, execute the following mutation to create a new account, replacing the appropriate values as needed:
mutation AddAccount {
  CoreAccountCreate(
    data: {
      name: {value: "<ACCOUNT-NAME>"},
      password: {value: "<ACCOUNT-PASSWORD>"}
      # Optional - Assign the account to an existing group
      member_of_groups: [{hfid: "Infrahub Users"}]
    }
  ) {
    ok
    object {
      hfid
    }
  }
}
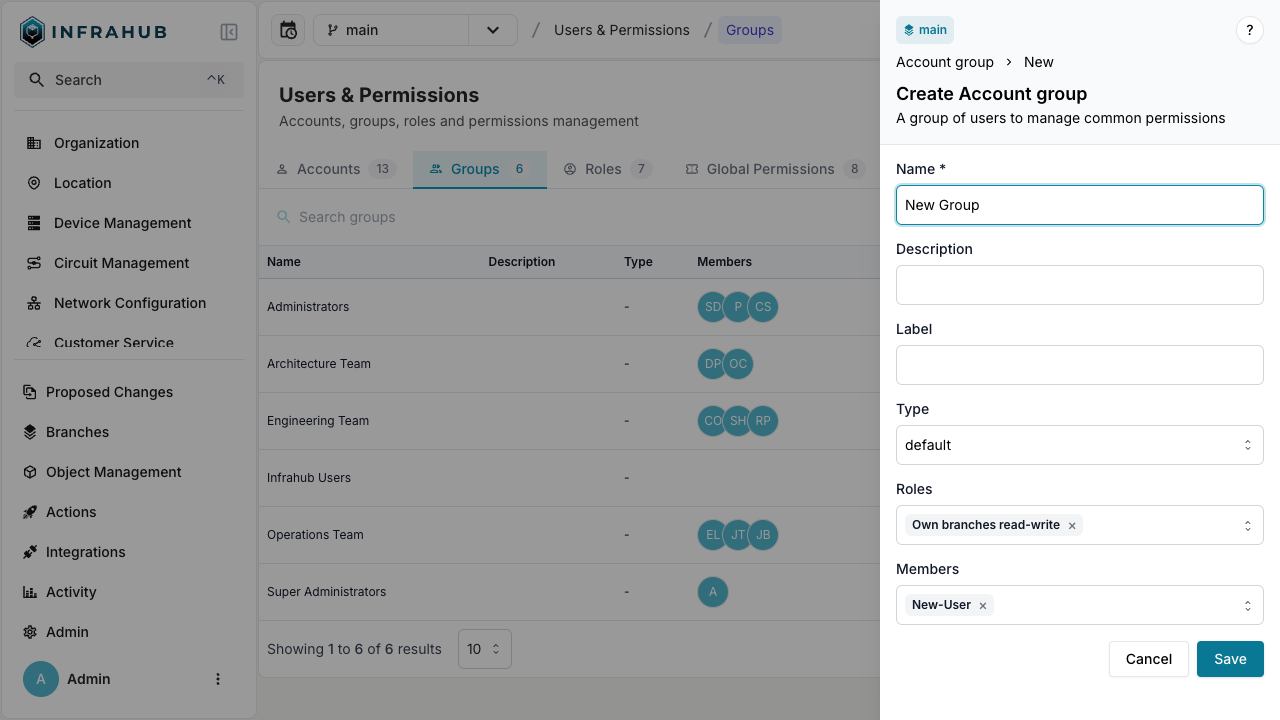
Creating a new account group
- Via the Web Interface
- Via the GraphQL Interface
Via the Web Interface
- Log in to the Infrahub UI as an administrator.
- Go to Admin > Role Management in the left side menu.
- In the Groups tab, click on Create Account Group.
- Enter a name for the group.
- Optionally, assign roles to the group.
- Click Create to create the group.

Via the GraphQL Interface
In the GraphQL sandbox, execute the following mutation to create a new group:
mutation AddGroup {
  CoreAccountGroupCreate(
    data: {
      name: {value: "<GROUP-NAME>"},
      # Optional - Assign existing roles
      roles: [{hfid: "General Access"}]
    }
  ) {
    ok
    object {
      hfid
    }
  }
}
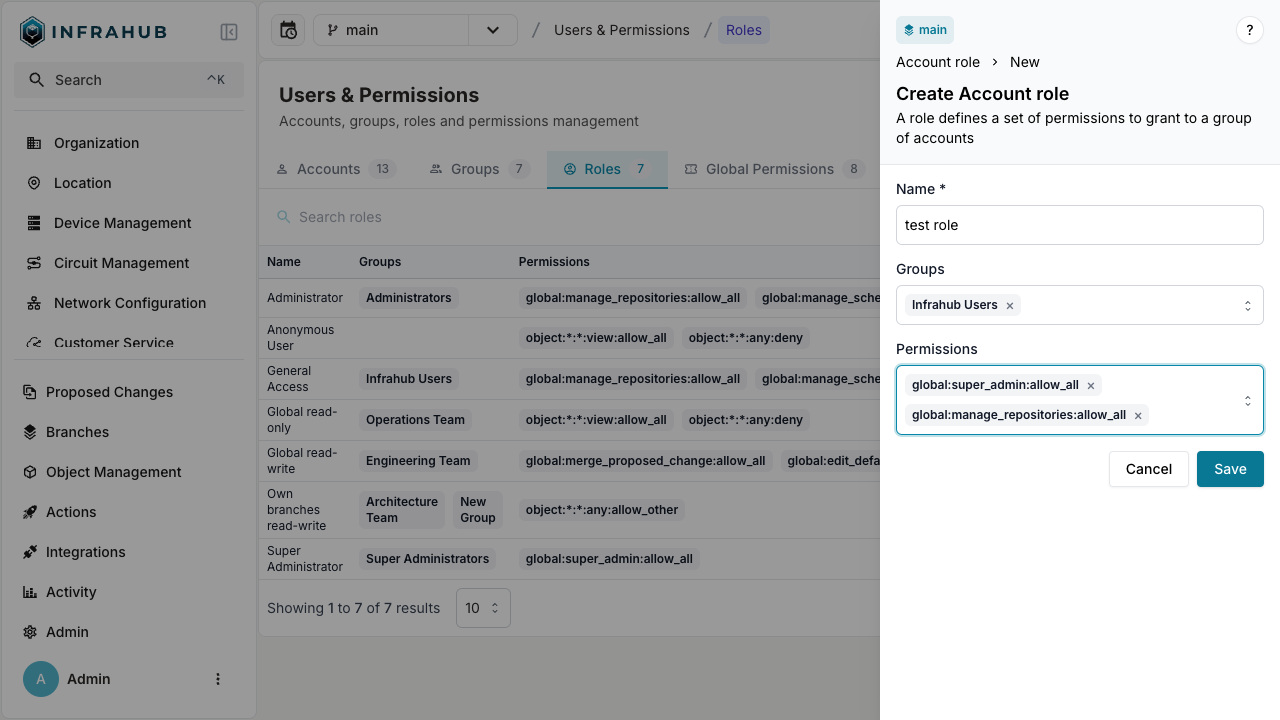
Creating and assigning roles
- Via the Web Interface
- Via the GraphQL Interface
Via the Web Interface
- Log in to the Infrahub UI as an administrator.
- Go to Admin > Role Management in the left side menu.
- In the Roles tab, click on Create Account Role.
- Provide a name for the role.
- Select the permissions you wish to assign to the role.
- Optionally, assign the role to an existing group.
- Click Create to create the role.

Via the GraphQL Interface
In the GraphQL sandbox, execute the following mutation to create a new role:
mutation AddRole {
  CoreAccountRoleCreate(
    data: {
      name: {value: "test role"},
      # Optional - Assign the role to an existing group
      groups: [{hfid: "Infrahub Users"}]
    }
  ) {
    ok
    object {
      hfid
    }
  }
}
Managing permissions
Permissions can be managed through roles assigned to users or groups. Infrahub supports Global and Object-specific permissions, allowing fine-grained control over what users can do within the system. For a complete list of available global and object permissions, see the Roles and Permissions documentation.
Creating and global permissions
- Via the Web Interface
- Via the GraphQL Interface
Via the Web Interface
- Log in to the Infrahub UI as an administrator.
- Go to Admin > Role Management in the left side menu.
- In the Global Permissions tab, click on Create Global Permission.
- Select the action you which to use.
- Select the decision for this action.
- Optionally, assign the permission to an existing role.
- Click Create to create the permission.
Via the GraphQL Interface
In the GraphQL sandbox, execute the following mutation to create a new global permission:
mutation AddGlobalPermissions {
  CoreGlobalPermissionCreate(
    data: {
      action: {value: "manage_accounts"},
      # 6 is the enum value for "allow"
      decision: {value: 6}
    }
  ) {
    ok
    object {
      identifier {
        value
      }
    }
  }
}
Creating and objects permissions
- Via the Web Interface
- Via the GraphQL Interface
Via the Web Interface
- Log in to the Infrahub UI as an administrator.
- Go to Admin > Role Management in the left side menu.
- In the Objects Permissions tab, click on Create Object Permission..
- Provide the namespace and name of the object(s) you want to interact with.
- Select the action and decision you wish to use for this permission.
- Optionally, assign the permission to an existing role.
- Click Create to create the permission.
Via the GraphQL Interface
In the GraphQL sandbox, execute the following mutation to create a new global permission:
mutation AddObjectPermissions {
  CoreObjectPermissionCreate(
    data: {
      namespace: {value: "Builtin"},
      name: {value: "Tag"},
      action: {value: "view"},
      # 4 is the enum value for "allow_other"
      decision: {value: 4 }
    }
  ) {
    ok
    object {
      identifier {
        value
      }
    }
  }
}