Demo-dc-fabric
This repository demos key Infrahub features using an example data center running VxLAN / EVPN and firewalls. It demonstrates the capabilities to use Infrahub with Arista AVD and Containerlab. Infrahub generates configurations that AVD deploys to a Containerlab topology.

Running the demo
Clone the repository
Clone the GitHub repository to the server you will run this demo on:
git clone https://github.com/opsmill/infrahub-demo-dc-fabric.git
Prerequisites
Before you get started, make sure the following tools are installed:
-
✅ Infrahub Docker Compose Requirements Follow the Infrahub installation guide to set up the necessary Docker Compose environment.
-
🐍 Poetry Install Poetry by following the official installation guide.
-
🧪 Containerlab (For Lab Testing) If you plan to run lab topologies, you'll also need Containerlab.
Set environmental variables
export INFRAHUB_ADDRESS="http://localhost:8000"
export INFRAHUB_API_TOKEN="06438eb2-8019-4776-878c-0941b1f1d1ec"
export CEOS_DOCKER_IMAGE="registry.opsmill.io/external/ceos-image:4.29.0.2F"
export LINUX_HOST_DOCKER_IMAGE="registry.opsmill.io/external/alpine-host:v3.1.1"
Install the Infrahub SDK
Our demos use poetry to manage the Python environment.
poetry install --no-interaction --no-ansi --no-root
Start Infrahub
poetry run invoke start
Load schema and data into Infrahub
The invoke command will create:
- Basic data (Account, organization, ASN, Device Type, and Tags)
- Location data (Locations, VLANs, and Prefixes)
- Topology data (Topology, Topology Elements)
- Security data (Policies, rules, objects)
poetry run invoke load-schema load-data
Demo flow
1. Add the repository into Infrahub via GraphQL
Reference the Infrahub documentation for the multiple ways this can be done.
mutation AddRepository{
  CoreReadOnlyRepositoryCreate(
    data: {
      name: { value: "infrahub-demo-dc-fabric" }
      location: { value: "https://github.com/opsmill/infrahub-demo-dc-fabric.git" }
    }
  ) {
    ok
    object {
      id
    }
  }
}
2. Generate a topology (devices, interfaces, cabling, BGP sessions, ...)
The example below creates the topology fra05-pod1
poetry run infrahubctl run bootstrap/generate_topology.py topology=fra05-pod1
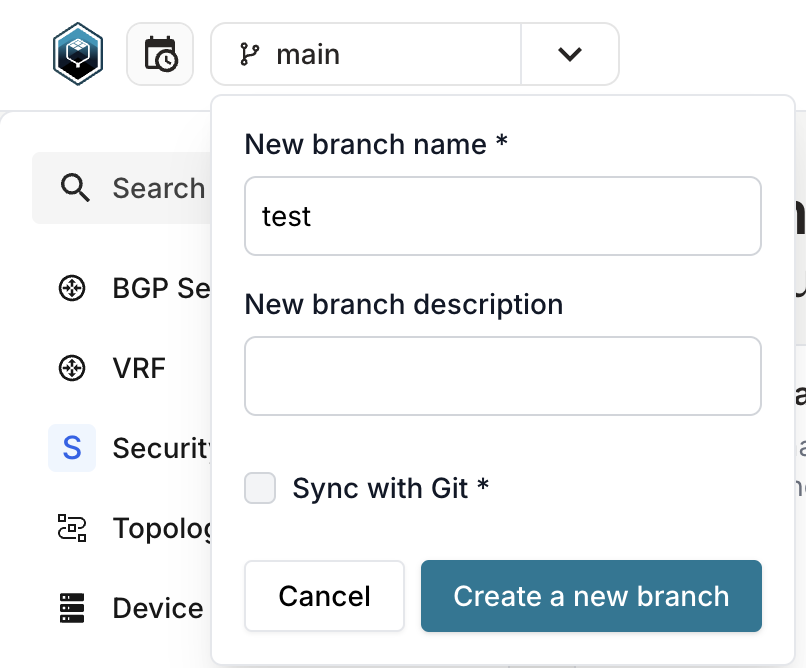
3. Create a branch
Via the UI
4. Create a new l2 or l3 service
In the menu navigate to Network Service > Network Service and click on the Add Network Service button http://localhost:8000/objects/TopologyNetworkService
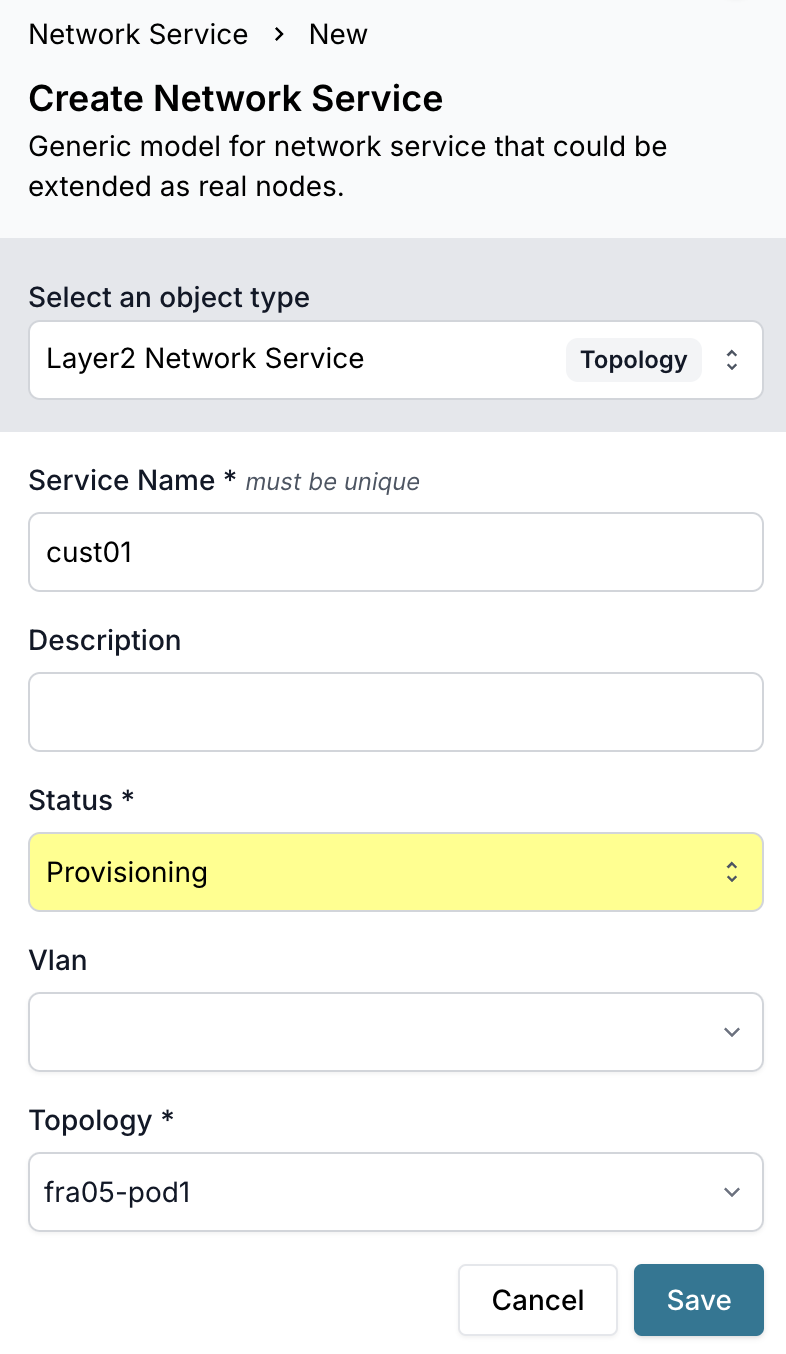
The example below creates the Layer2 network service and a another Layer3 on topology fra05-pod1
5. Add the newly created service to the network_services group
In the menu navigate to Object Management > Groups.
Search for the group network_services and click on it to open the group's detailed view.
Open the members tab, click the Add Members button and add your newly created L2 or L3 network service.
6. Create a proposed change
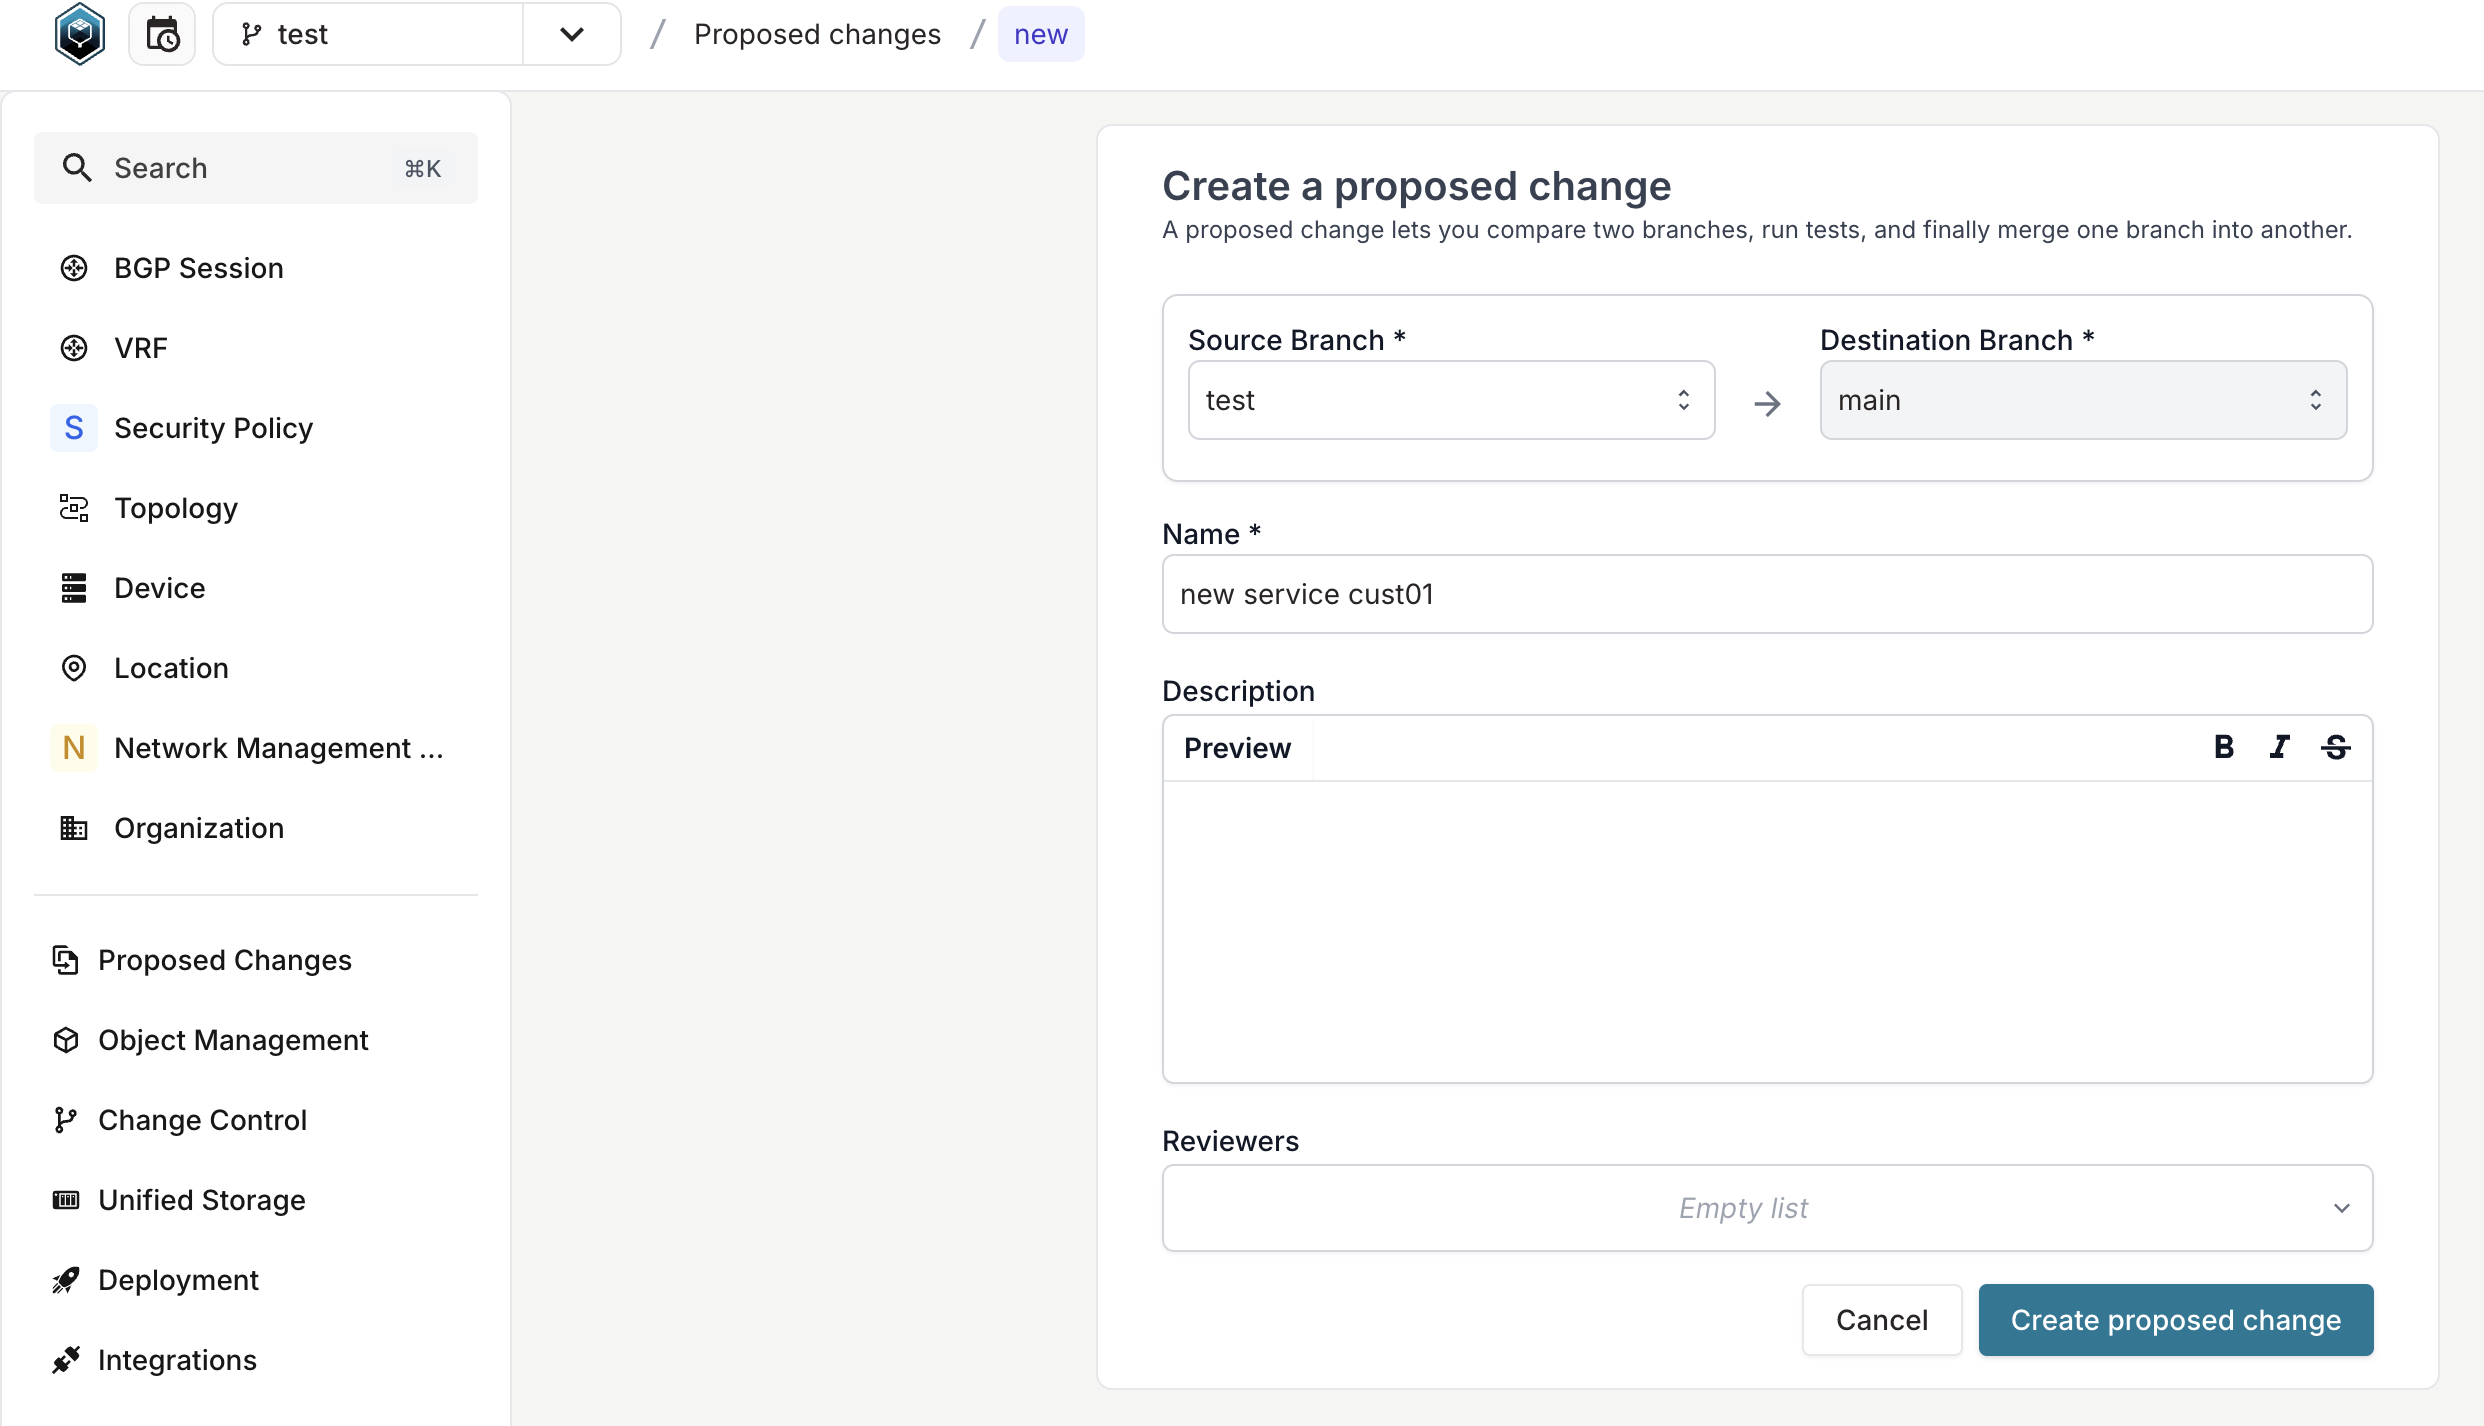
This command will run the generator and render the artifacts

7. Try out our pytest plugin
The command will use our Infrahub pytest plugin. It will run the different test in the tests folder. These tests include:
- Syntax checks for all the GraphQL Queries
- Syntax checks for the Checks
- Syntax checks for all the jinja files used in
templates - will use the input/output file to try out the rendering and confirm there is no unexpected missing piece
pytest -v ./tests
8. Create a new Branch
Create a new branch test2 in the UI, or if you prefer to use our SDK in CLI:
poetry run infrahubctl branch create test2
9. Try out the topology check
-
Modify an Element in a Topology (example: increase or decrease the quantity of leaf switches in fra05-pod1)
-
The checks will run in the Proposed Change ->
check_device_topologywill fail.
10. Deploy your environment to ContainerLabs
Infrahub automatically generates a Containerlab topology for each defined topology. This topology is attached as an artifact to the corresponding topology object. Each device also includes its own startup configuration, stored as a separate artifact.
Using the Containerlab CLI, we can deploy the lab—this spins up all devices as Docker containers and loads their respective startup configurations.
# Download all artifacts automatically to ./generated-configs/
poetry run python3 scripts/get_configs.py

# Start the Containerlab
sudo -E containerlab deploy -t ./generated-configs/clab/fra05-pod1.yml --reconfigure
Now you can log in from any device with your SSH client!
username: admin - password: admin
DNS entries follow this pattern: clab-demo-dc-fabric-$nodeName
ssh admin@clab-demo-dc-fabric-fra05-pod1-spine1
(admin@clab-demo-dc-fabric-fra05-pod1-spine1) Password:

fra05-pod1-spine1>