Manage changes with branching and version control
In Infrahub, version control is natively integrated into the graph database which opens up some new capabilities like branching, diffing, and merging data directly in the database.
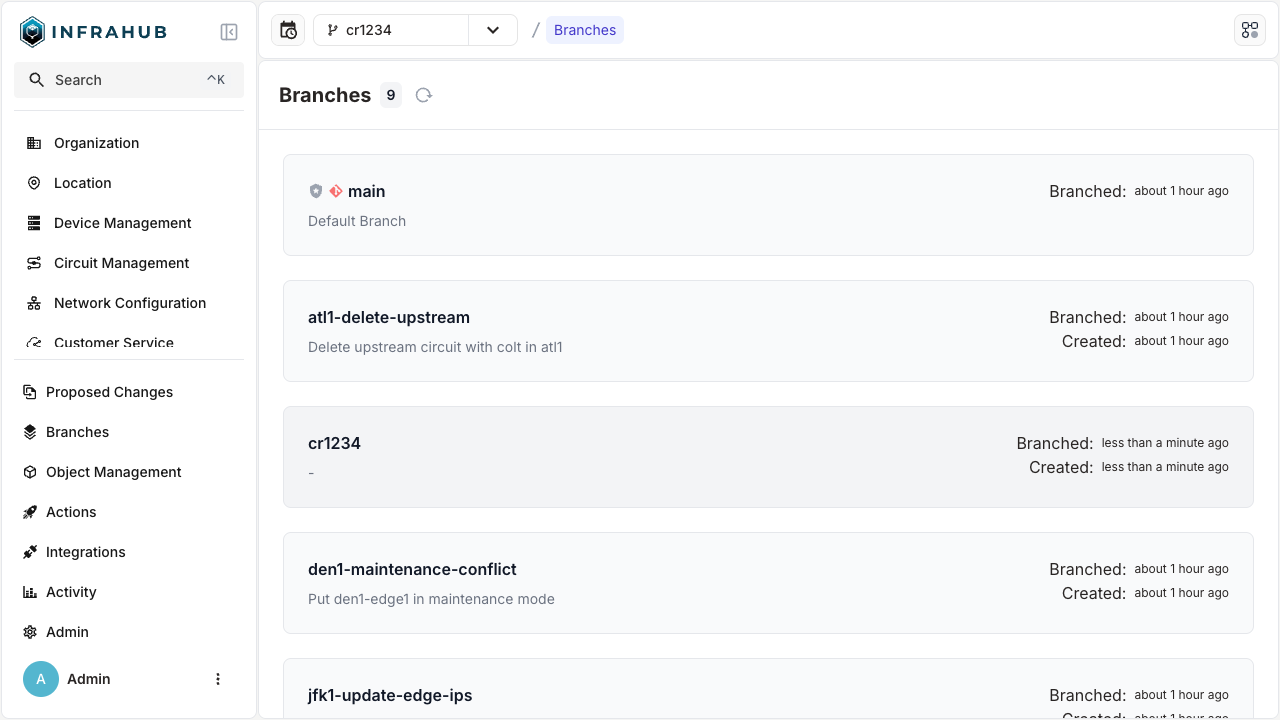
The default branch is called main.
Create a new branch
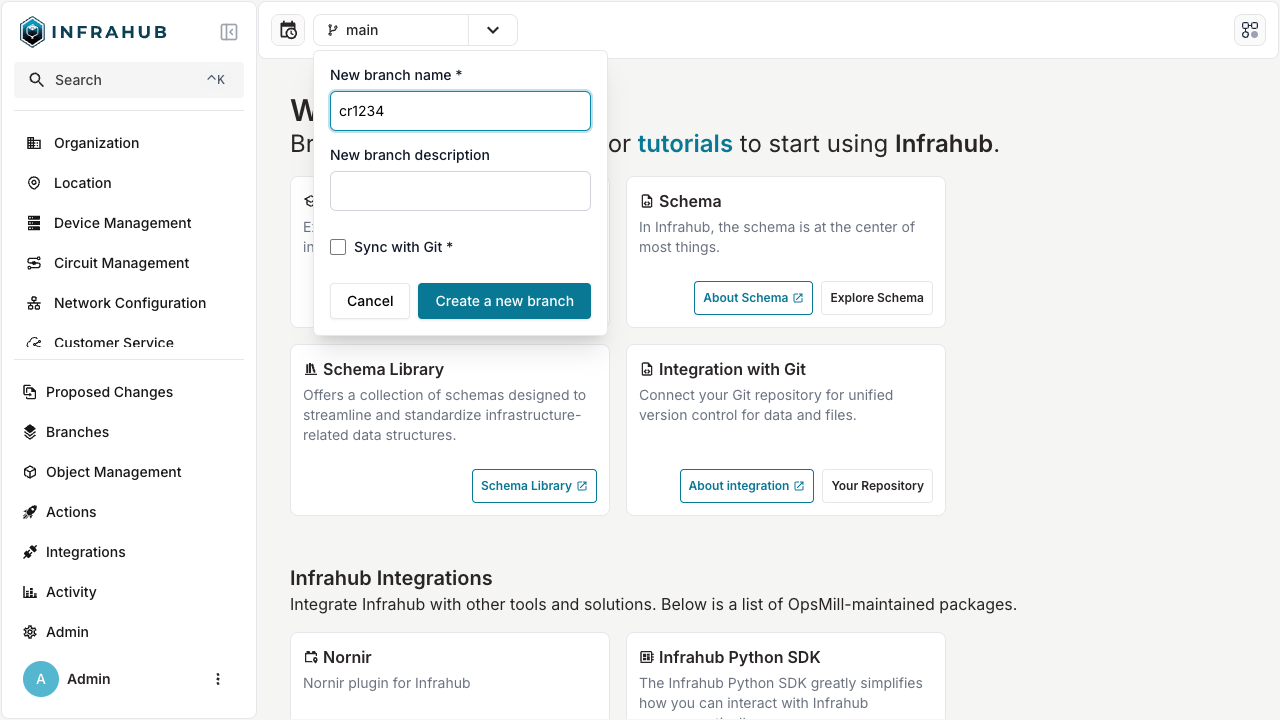
To get started, let's create a new branch that we'll call cr1234.
You can create a new branch in the frontend by clicking the branch selector in the top left corner, next click on the + sign next to the search field.
Branch names are fairly permissive, but must conform to git ref format. For example, slashes (/) are allowed, tildes (~) are not.
Other options available
Create a new branch with infrahubctl
Use the command below to create a new branch named cr1234
infrahubctl branch create cr1234
Execute invoke demo.cli-git to start a shell session that will give you access to infrahubctl.
Create a new branch using GraphQL
Use the GraphQL mutation below to create a new branch named cr1234. In GraphQL a 'mutation' is used
whenever you want to change data, i.e., create, update, or delete. For reading data a 'query' is used.
# Endpoint : http://127.0.0.1:8000/graphql/main
mutation {
  BranchCreate(data: { name: "cr1234" }) {
    ok
    object {
      id
      name
    }
  }
}
You'll need to provide a header to execute this operation:
X-INFRAHUB-KEY: 06438eb2-8019-4776-878c-0941b1f1d1ec
Modify a tenant via the UI
The name of the active branch in the top left corner should now be cr1234.
- Open the tenant list view by clicking on
Tenantin theOrganizationsection of the menu.
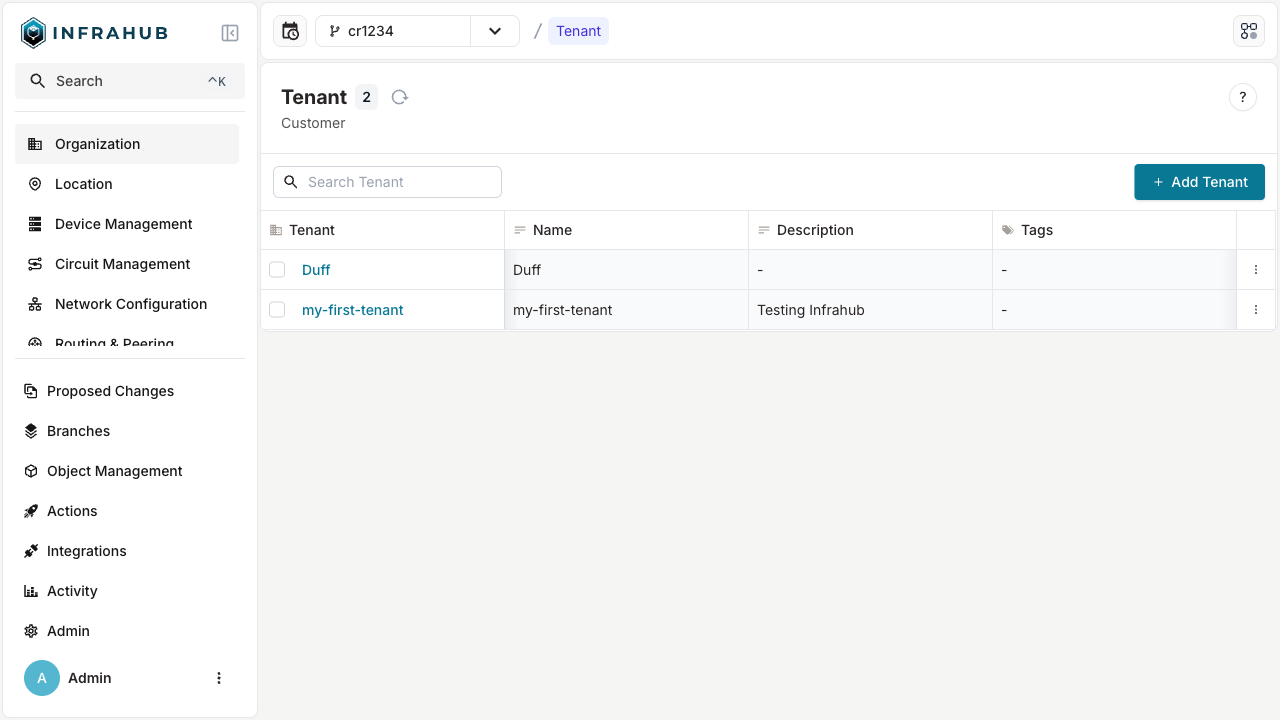
- Select the
my-first-tenanttenant (created in the previous step).
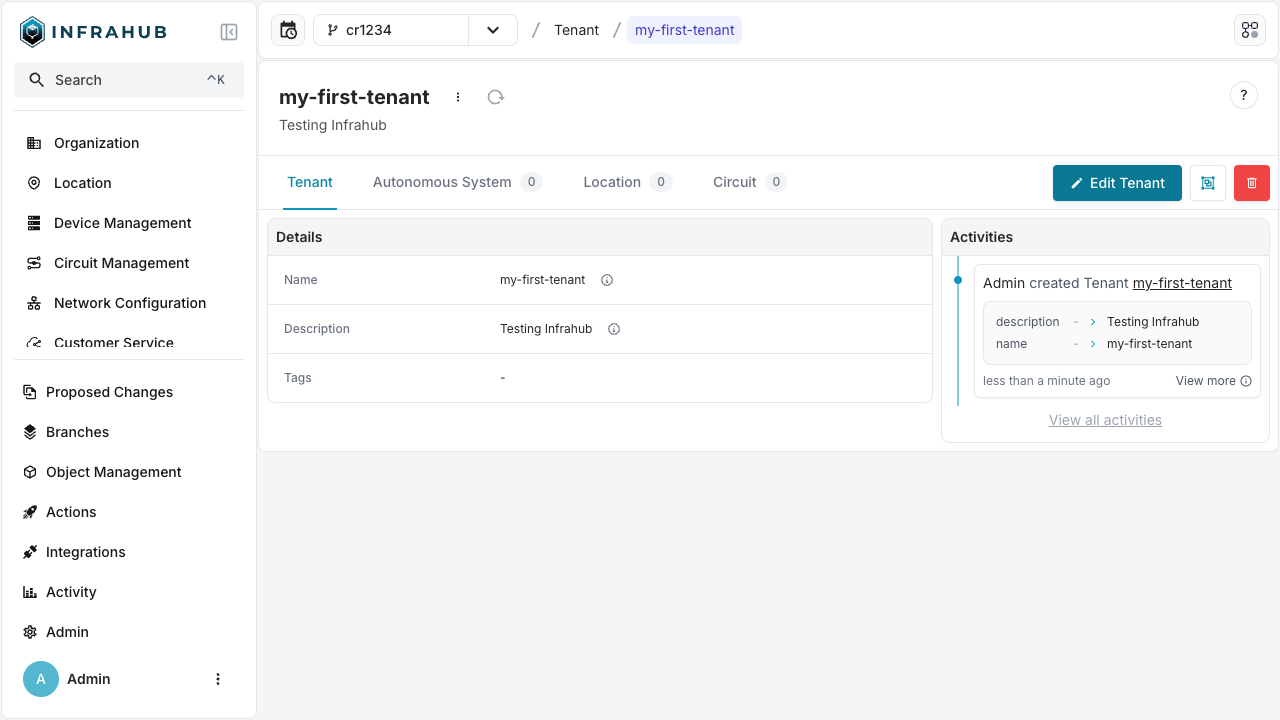
- Click on the
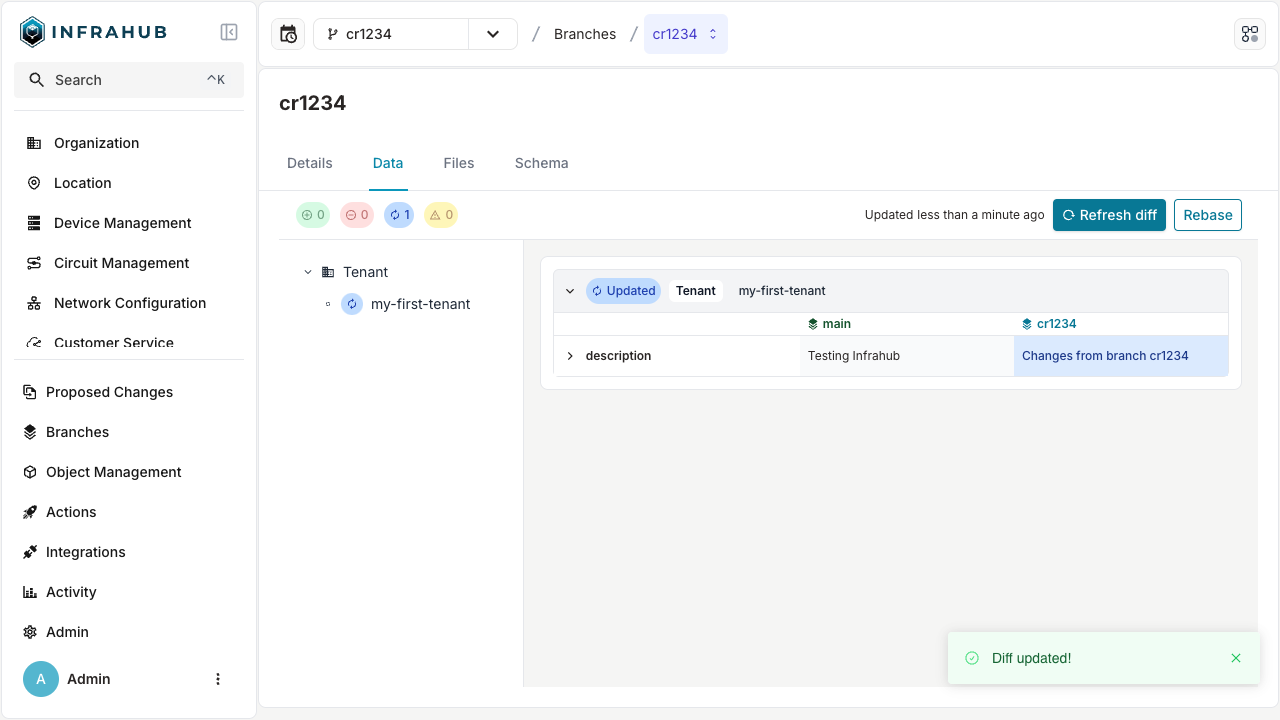
Edit Tenantbutton on the top right corner. - Update the description attribute of the organization, for example with
Changes from branch cr1234.
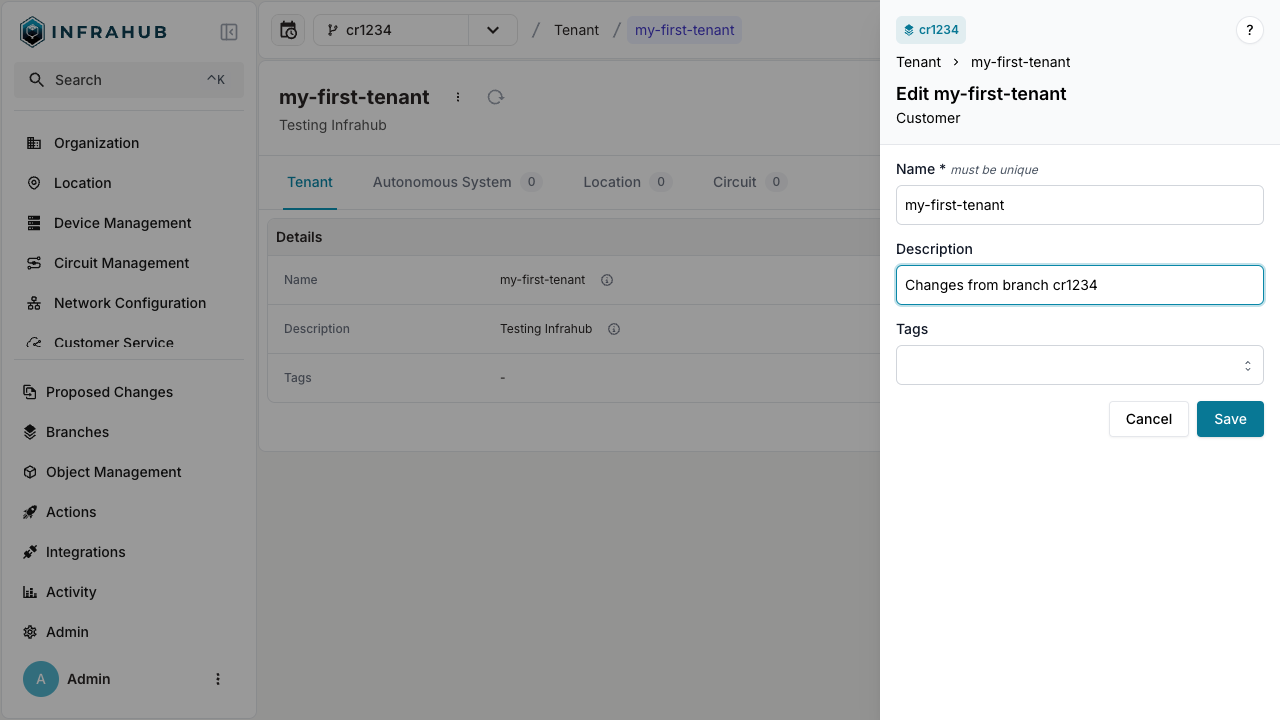
- Save your change with the button
save.
Go back to the detailed page for the Tenant my-first-tenant and try to switch branches with the branch selection menu at the top.
You should be able to see the value of the label change when you change the branch.
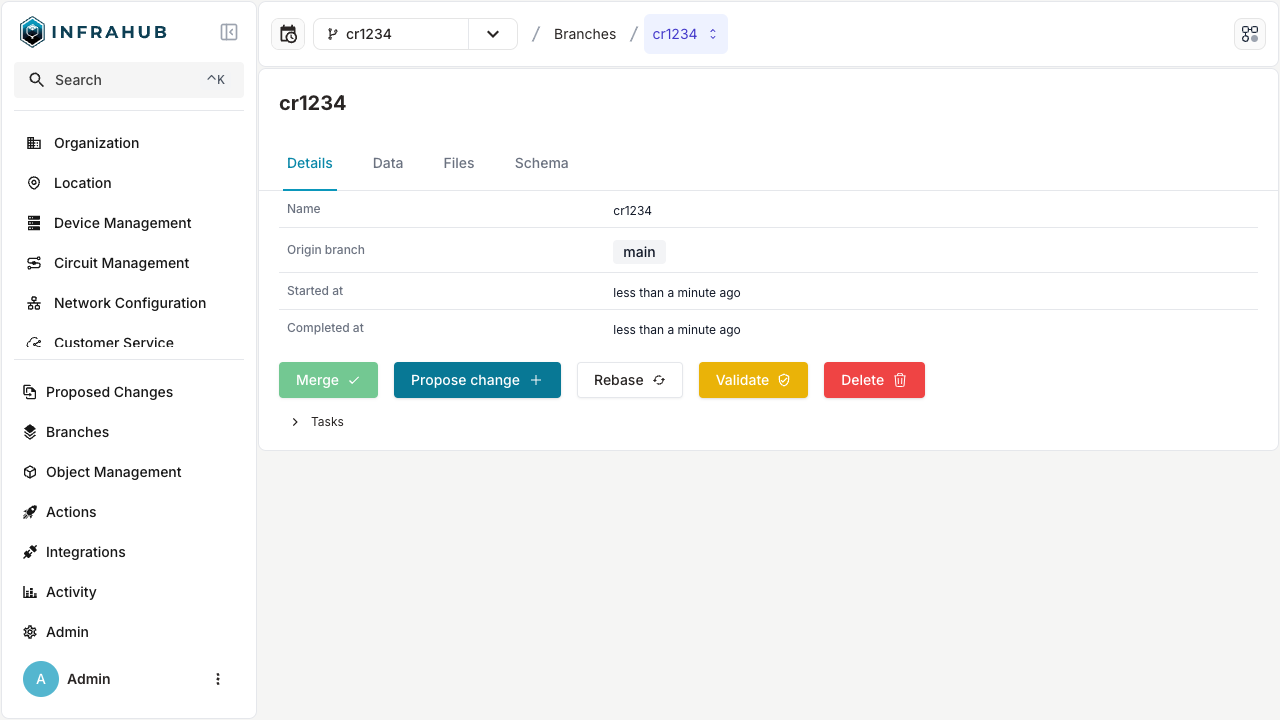
View the Diff and Merge the branch cr1234 into main
Now that we have modified some data in a controlled environment, and after validating that everything is right, we can integrate these changes in the main branch by merging the branch cr1234 into main.
To view changes and merge a branch you need to:
- Navigate to the branch page in the menu on the left under the Change Control section (or follow this link).
- Click on the
cr1234branch. - Navigate to the
Datatab and wait for the diff to be generated. Once the diff is generated we can expand the changes to view the diff between thecr1234andmainbranch.
- Navigate to the
Detailstab. - Click the
Mergebutton, to merge the branch intomain.
Other options available
Merge a Branch with infrahubctl
Use the command below to create a new branch named cr1234.
infrahubctl branch merge cr1234
Execute invoke demo.cli-git to start a shell session that will give you access to infrahubctl
Merge a Branch using GraphQL
Use the GraphQL query below to merge the branch named cr1234:
# Endpoint : http://127.0.0.1:8000/graphql/main
mutation {
  BranchMerge(data: { name: "cr1234" }) {
    ok
    object {
      id
      name
    }
  }
}
You'll need to provide a header to execute this operation:
X-INFRAHUB-KEY: 06438eb2-8019-4776-878c-0941b1f1d1ec
Go back to the detailed page for the Tenant my-first-tenant.
The object should now have the value previously defined in the branch. Try switching between the main branch and cr1234.
For an in-depth understanding of Infrahub's approach to handling differences between branches and merging them, please consult the proposed change topic.